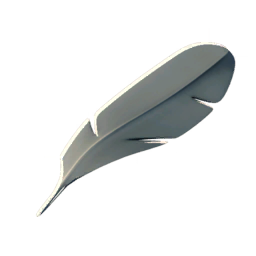
Fading Feather
Feels like it will disappear soon.
Basic Information
How to Obtain Fading Feather
Kill Drop
Decompose from the following items
 Totem: Aegis II
 Totem: Aegis I
 Totem: Assault II
 Totem: Assault I
 Totem: Warrior II
 Totem: Warrior I
 Totem: Agile II
 Totem: Sturdy III
 Totem: Physical RES I
 Totem: Marathon I
 Totem: Hunger Master
 Totem: Stamina
 Totem: Electric RES II
 Totem: Electric RES I
 Totem: Efficiency II
 Totem: Gun Control III
 Totem: Tactical Reload
 Totem: Ninja II
 Totem: Ninja I
 Totem: Aegis III
 Totem: Electric RES III
 Totem: Marathon II
 Totem: Marathon III
 Totem: Fire RES II
 Totem: Fire RES III
 Totem: Fire RES I
 Totem: Assault III
 Totem: Recovery II
 Totem: Recovery III
 Totem: Recovery I
 Totem: HP II
 Totem: HP III
 Totem: HP I
 Totem: Ninja III
 Totem: Physical RES II
 Totem: Physical RES III
 Totem: Poison RES II
 Totem: Poison RES III
 Totem: Poison RES I
 Totem: Space RES II
 Totem: Space RES III
 Totem: Space RES I
 Totem: Efficiency III
 Totem: Efficiency I
 Totem: Gun Control II
 Totem: Gun Control I
 Totem: Headshot II
 Totem: Headshot III
 Totem: Headshot I
 Totem: Sniper II
 Totem: Sniper III
 Totem: Sniper I
 Totem: Warrior III
 Totem: Berserk II
 Totem: Berserk III
 Totem: Berserk I
 Totem: Perception II
 Totem: Perception III
 Totem: Perception I
 Totem: Agile III
 Totem: Agile I
 Totem: Sturdy II
 Totem: Sturdy I
Crafting Formula
Decompose Result
Loot Drop and Difficulty Level Relationship
Loot Boxes
Relationship Between Difficulty Level and Drop Rate Multipliers
After digging through the game files, I found that difficulty level has no effect on loot box drop multipliers or quality. Every difficulty in the same scene pulls from the same config. What actually matters is the scene itself, not how hard you set the game.
Item Quantity Impact
The number of random items you get from loot boxes comes down to lootboxItemCountMultiplier (loot box item count multiplier) in the scene config. A higher multiplier means more stuff drops.
Probability Calculation Formula
The drop probability of items in loot boxes varies depending on the drop type:
1. Fixed Drop Probability
Fixed drop probability directly uses fixedItemSpawnChance (fixed item spawn chance) from the loot box configuration:
Fixed Drop Probability = fixedItemSpawnChance
Fixed Drop Quantity = 1
2. Random Drop Probability
Random drops have two generation methods with different probability calculations:
Method A: Generate from Random Pool (randomFromPool = true)
Random Drop Probability = Item Weight / Total Random Pool Weight
Method B: Generate by Tag and Quality (randomFromPool = false)
Random Drop Probability = (Tag Weight / Total Tag Weight) × (Quality Weight / Total Quality Weight) × (1 / Matching Items Count)
Where:
- Tag Weight: The weight of the tag that the item belongs to in the loot box
- Total Tag Weight: Sum of weights of all tags in the loot box
- Quality Weight: The weight of the item's quality in the loot box
- Total Quality Weight: Sum of weights of all valid qualities (1-6) in the loot box
- Matching Items Count: Number of items that match both the tag and quality
Example: Calculating the drop probability of an Equipment tag, Quality 1 item
Assume a loot box has the following configuration:
- Tag configuration: Equipment (weight 2), Gun (weight 8), Bullet (weight 4), Explosive (weight 3), Accessory (weight 10)
- Quality configuration: Quality 1 (weight 250), Quality 2 (weight 150), Quality 3 (weight 80), Quality 4 (weight 30), Quality 5 (weight 10), Quality 6 (weight 3)
- Matching items: There are 5 items with Equipment tag and Quality 1
Calculation process:
- Total Tag Weight = 2 + 8 + 4 + 3 + 10 = 27
- Total Quality Weight = 250 + 150 + 80 + 30 + 10 + 3 = 523
- Random Drop Probability = (2 / 27) × (250 / 523) × (1 / 5) ≈ 0.00708 = 0.708%
So the random drop probability of this item in this loot box is approximately 0.708%.
Average Expected Count Calculation Formula
When an item only has random drops (no fixed drops) in loot boxes, the average expected count is displayed. The calculation formula is as follows:
-
Expected count for a single random drop:
Expected Count = Random Drop Probability × Average Quantity
Average Quantity = (Min Quantity + Max Quantity) / 2
Where min and max quantities come from the loot box configuration's
randomCount(random item quantity range). -
Average expected count:
Average Expected Count = Sum of all expected counts / Number of random dropsThat is, the average of expected counts from all random drops.
Example:
- Loot Box A: Random drop probability 0.1, Quantity Range 1-3, Expected Count = 0.1 × (1+3)/2 = 0.2
- Loot Box B: Random drop probability 0.05, Quantity Range 2-4, Expected Count = 0.05 × (2+4)/2 = 0.15
- Average Expected Count = (0.2 + 0.15) / 2 = 0.175
Note: When there are sufficient loot boxes in the game, you have a high probability of obtaining this item after one scavenging run.
Item Quality Impact
Item quality in loot boxes depends on LootBoxQualityLowPercent (loot box low quality percentage), calculated from lootBoxHighQualityChanceMultiplier (loot box high quality chance multiplier). The higher this multiplier, the better your odds of getting high-quality loot.
Drop Rate Configuration by Scene
Here's what I found for each scene. Note that all difficulty levels share these same values:
| Scene | Item Count Multiplier | High Quality Chance Multiplier | Notes |
|---|---|---|---|
| Bunker | 1.0 | 1.0 | Standard rate |
| Farm Town | 1.1 | 1.1 | +10% item count multiplier, +10% high quality chance multiplier |
| Ground Zero | 1.0 | 1.0 | Standard rate |
| Prologue | 1.0 | 1.0 | Standard rate |
| Warehouse Area | 1.1 | 1.05 | +10% item count multiplier, +5% high quality chance multiplier |
| Prison | 1.0 | 1.0 | Standard rate |
| J-Lab | 1.15 | 1.15 | +15% item count multiplier, +15% high quality chance multiplier |
| DEMO Ultimate Challenge | 1.0 | 1.0 | Standard rate |
| Storm Area | 1.15 | 1.15 | +15% item count multiplier, +15% high quality chance multiplier |
| ZoneZ | 1.0 | 1.0 | Standard rate |
| Rift | 1.0 | 1.0 | Standard rate |
| Lab Area 37 | 1.15 | 1.15 | +15% item count multiplier, +15% high quality chance multiplier |
| Labyrinth | 1.25 | 1.25 | +25% item count multiplier, +25% high quality chance multiplier |
| Zero-Degree Challenge | 1.25 | 1.25 | +25% item count multiplier, +25% high quality chance multiplier |
Notes:
- Item Count Multiplier: Higher value = more items drop.
- High Quality Chance Multiplier: Higher value = better chance for high-quality gear.
Creature Kill Drops
Creature drops are completely unaffected by difficulty:
- What you get is locked to the creature's preset config
- Cranking up difficulty won't change their drop tables
- Same drops whether you're on easy or the hardest setting
Time's Impact on Creature Spawning
Time doesn't change drop rates, but it changes what spawns. Certain creatures only show up at night (22:00-5:00). They drop the same loot as daytime creatures—just different spawn windows.
So why does night feel more rewarding? Simple: more creatures. Daytime spawns stick around, and night creatures spawn on top of them. More targets = more loot.
Night Creatures by Scene
These creatures only appear at night:
Ground Zero
Warehouse Area
Farm Town
Summary
| Drop Type | Affected by Difficulty | How It Works |
|---|---|---|
| Loot Boxes | No | Scene config only, difficulty doesn't matter Item quantity: lootboxItemCountMultiplierItem quality: lootBoxHighQualityChanceMultiplier |
| Creature Kills | No | Tied to each creature's preset config |
Can't find what you're looking for?Send us an email


